


Looking to add a personal touch to your gift-giving? Look no further! In this article, we will provide you with step-by-step instructions on how to create your very own DIY paper box. Perfect for any occasion, these handmade boxes are not only easy to make but also a unique way to show someone you care. Let’s get crafting!
- Materials needed: Gather scissors, ruler, pencil, decorative paper, and glue.
- Step 1: Measure and cut the decorative paper to the desired size for the box.
- Step 2: Fold the paper along the scored lines to create the box shape.
- Step 3: Use glue to secure the edges of the box together.
- Step 4: Allow the glue to dry completely before using the DIY paper box for storage or gifting.
What are the steps for making homemade paper?
To make homemade paper, start by tearing or cutting up recycled paper into small pieces. Soak the paper in a large container of water for a few hours or overnight. Once the paper is soft, blend it into a pulp using a blender or food processor. Next, pour the pulp into a shallow container and add in any desired decorative elements such as flower petals or glitter. Then, dip a mesh screen into the pulp mixture and lift it out, allowing the water to drain off. Gently press the pulp to form an even layer on the screen. Finally, remove the screen and let the paper dry completely before carefully peeling it off.
Once your homemade paper is dry, you can use it for various crafts such as card-making, scrapbooking, or even writing letters. The process of making homemade paper is not only simple and fun, but also a great way to recycle old paper and reduce waste. Experiment with different types of paper and additives to create unique and personalized designs. With a little creativity and patience, you can produce beautiful handmade paper that is both eco-friendly and stylish.
How can paper be made in 5 steps?
Making paper is a simple and rewarding process that anyone can do at home. The first step is to gather your materials, including recycled paper, a blender, a large tub of water, and a mold and deckle. Next, tear the paper into small pieces and soak them in water for a few hours to soften. Then, blend the paper and water mixture until it becomes a pulp. After that, pour the pulp into the tub of water and use the mold and deckle to scoop and drain the pulp into a thin layer. Finally, press and dry the paper to complete the process.
In order to make your own paper, start by gathering your materials and then tearing the paper into small pieces. Soak the paper in water and blend it into a pulp, before pouring it into a tub of water. Use a mold and deckle to scoop and drain the pulp into a thin layer, then press and dry the paper to complete the process. Following these 5 steps will result in a beautiful and unique piece of homemade paper that you can use for various crafts and projects.
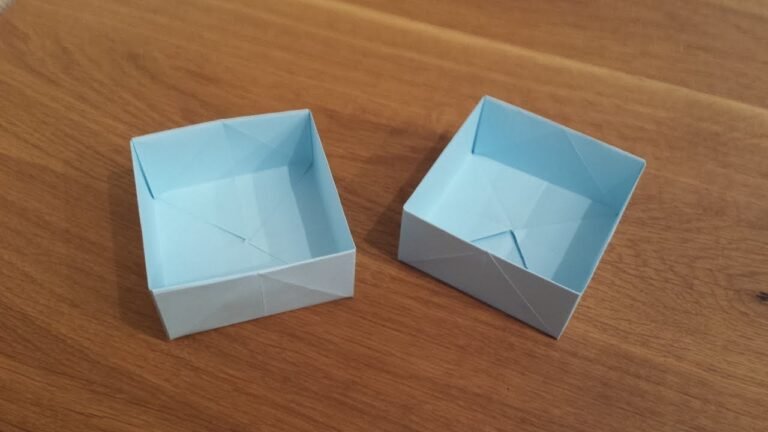
Simple Steps to Craft Your Own Paper Box
Are you looking for a fun and creative way to package your gifts? Look no further than crafting your own paper box! With just a few simple materials and easy steps, you can create a personalized and unique box that will impress your friends and loved ones. Whether it’s for a birthday, holiday, or special occasion, crafting your own paper box adds a personal touch to any gift.
To start, gather all the materials you will need: sturdy paper, scissors, ruler, and adhesive. Choose a paper that suits the occasion and the size of the box you want to make. Once you have your materials, follow these simple steps to craft your own paper box. First, measure and cut the paper to the desired size for your box. Then, fold along the lines to create the sides and bottom of the box. Finally, use adhesive to secure the edges and voila, you have your very own handmade paper box!
Crafting your own paper box is not only a fun and rewarding activity, but it also allows you to add a personal touch to your gifts. By following these simple steps and using your creativity, you can impress your friends and loved ones with a beautifully crafted paper box that is sure to make your gift stand out. So why settle for a store-bought box when you can easily create your own unique and personalized paper box?
Quick and Easy Paper Box Tutorial
Looking to create your own paper box in a flash? This quick and easy tutorial will guide you through the simple steps to craft a stylish paper box that is perfect for storing small items or giving as a gift. With just a few folds and cuts, you’ll have a personalized paper box that is both practical and charming. Get ready to impress with your DIY skills and make a statement with this fun and functional project.
Step-by-Step Guide to Making a Paper Box
Looking to make your own paper box? Follow these simple steps for a fun and creative DIY project. Start by selecting a sturdy piece of paper, such as cardstock, in your desired color or pattern. Next, use a ruler and pencil to measure and mark the dimensions of your box, ensuring the sides are equal for a symmetrical look. Cut along the lines carefully with scissors, then fold along the crease lines to create the box shape. Finally, use glue or double-sided tape to secure the edges together, and voila – you have your very own handmade paper box!
To add a personal touch to your paper box, consider decorating it with stickers, washi tape, or even hand-drawn designs. This is a great way to showcase your creativity and make your box truly unique. You can also experiment with different sizes and shapes to create a variety of boxes for storing small items, gifts, or even as a decorative piece for your home. The possibilities are endless when it comes to customizing your paper boxes, so let your imagination run wild and have fun with the process!
Whether you’re looking to organize your belongings or create a special gift box, making a paper box is a simple and enjoyable craft that anyone can try. With just a few basic materials and a little bit of time, you can create a beautiful and functional box that is perfect for any occasion. So grab your supplies and get started on your paper box-making adventure today!
In conclusion, creating a DIY paper box is a fun and rewarding project that anyone can enjoy. With just a few simple materials and easy-to-follow instructions, you can make personalized and functional paper boxes for any occasion. Whether you’re looking for a creative way to organize your space or a unique gift idea, these DIY paper boxes are sure to impress. So, gather your supplies and get crafting – the possibilities are endless!