


Looking to add a touch of whimsy to your next event or home decor? DIY paper chains are a simple and affordable way to bring some color and charm to any space. In this article, we’ll explore a variety of creative tutorials that will guide you through the process of making your own paper chains with ease. Whether you’re looking to spruce up a party, wedding, or just add a pop of color to your living room, these DIY paper chain tutorials are sure to inspire your next crafting adventure.
Advantages
- Cost-effective: DIY paper chain tutorials allow you to create custom decorations at a fraction of the cost of buying pre-made ones.
- Personalization: By following DIY paper chain tutorials, you can customize the colors, patterns, and lengths of the paper chains to suit your specific event or aesthetic preferences.
Disadvantages
- Time-consuming: DIY paper chain tutorials can be time-consuming, requiring careful cutting, folding, and assembling of each individual link in the chain.
- Limited durability: Paper chains made from lightweight paper may not be as durable as store-bought decorations, and may easily tear or become damaged.
- Limited customization: DIY paper chain tutorials may have limited options for customization compared to store-bought paper chains, which come in a wide variety of colors, patterns, and materials.
- Skill level required: Some DIY paper chain tutorials may require a certain level of skill and precision, making it difficult for beginners or those with limited crafting experience to achieve the desired result.
How can a simple paper chain be made?
Looking for a fun and easy craft project? Try making a simple paper chain! Start by taking a strip of paper and curling it around to form a loop. Secure the ends together with glue, tape, or a stapler. Then, add more loops by feeding additional strips of paper through the middle of the previous link. Before you know it, you’ll have a colorful paper chain to decorate your home or office.
In just a few simple steps, you can create a charming paper chain to brighten up any space. Whether you’re looking for a quick DIY project or a creative way to add some flair to a party, this paper chain is the perfect solution. So grab some paper and get crafting!
What are the measurements for a paper chain?
Looking to create a paper chain for a fun and festive decoration? We recommend using strips that are 1″ wide by 8″ long. This standard size will ensure that your paper chain looks uniform and tidy. Cut as many strips as you need, depending on the length of the chain you desire.
Once you have your strips cut, it’s time to start assembling your paper chain. To create the first loop, simply paste, tape, or staple the ends of the strip together. If you prefer to use glue, make sure to hold the two ends of paper together until the glue properly dries to ensure a secure bond. Repeat this process with as many strips as you need to achieve the desired length of your paper chain.
In summary, for a visually appealing and well-proportioned paper chain, we recommend using strips that are 1″ wide by 8″ long. Cut as many strips as needed, and then securely connect the ends to form loops. Whether you choose to paste, tape, staple, or use glue, following these measurements and assembly instructions will result in a beautiful paper chain for any occasion.
What is the appropriate size for strips to use in a paper chain?
For a paper chain, the size of the strips is crucial in determining the overall look and feel of the final product. To achieve a balanced and visually appealing paper chain, it is recommended to use strips of uniform size. This not only ensures consistency in the chain’s appearance but also makes the assembly process easier and more efficient.
When selecting the size of the strips for your paper chain, consider the overall design and aesthetic you are aiming for. Thinner strips will create a more delicate and intricate chain, while wider strips will result in a bolder and more substantial look. Experiment with different sizes to find the perfect balance that complements your desired style.
In conclusion, the size of the strips for a paper chain plays a significant role in the chain’s overall appearance. By choosing strips of uniform size and considering the design aesthetic you want to achieve, you can create a visually striking and cohesive paper chain that is sure to impress. Experiment with different sizes to find the perfect balance between delicacy and boldness for your unique paper chain creation.
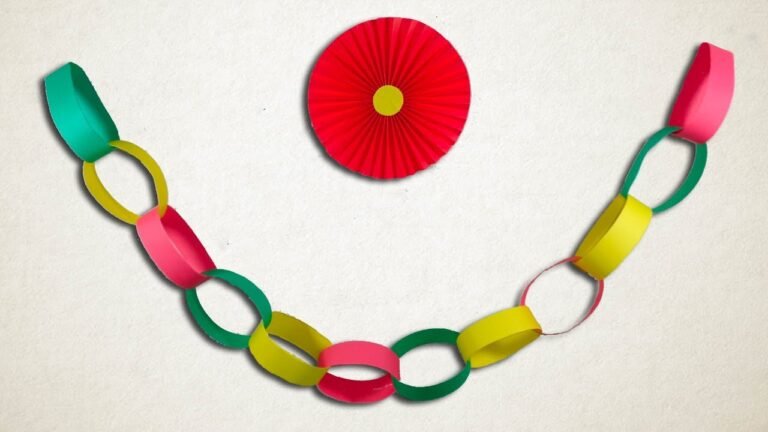
Colorful Paper Chain Designs for Every Occasion
Add a pop of color to your next event with our vibrant paper chain designs. Whether you’re celebrating a birthday, wedding, or holiday, our collection offers a variety of eye-catching patterns and hues to suit any occasion. From bold and bright to soft and pastel, our colorful paper chains are the perfect way to add a touch of fun and festivity to your next gathering.
Step-by-Step Paper Chain Instructions for Beginners
Looking to add some festive decor to your home? Create a vibrant paper chain with these easy step-by-step instructions for beginners. Start by gathering colorful construction paper, scissors, and glue. Then, simply cut the paper into strips, loop each strip into a circle, and secure with glue. Repeat this process with different colors and sizes to create a dynamic and eye-catching paper chain that will brighten up any space. With just a few supplies and a little creativity, you can easily transform your home with this fun and simple DIY project.
Innovative Paper Chain Crafts to Brighten Up Any Space
Looking to add a pop of color and creativity to your space? Look no further than these innovative paper chain crafts. Whether you’re decorating for a party or just wanting to spruce up a room, these easy-to-make paper chains are the perfect solution. Using vibrant and patterned paper, you can create unique and eye-catching designs that will instantly brighten up any space. With just a few simple materials and a little bit of creativity, you can transform any room into a lively and inviting environment.
Say goodbye to boring decor and hello to these vibrant paper chain crafts. With endless possibilities for customization, you can mix and match colors and patterns to create a one-of-a-kind look that perfectly complements your space. These innovative paper chain crafts are not only a fun and simple DIY project, but they also have the power to instantly uplift any room. Whether you’re looking to add a touch of whimsy to a child’s bedroom or want to bring a festive atmosphere to a party, these paper chains are the perfect way to brighten up any space.
Incorporating DIY paper chains into your crafting repertoire is a fantastic way to add a touch of charm and whimsy to any event or space. With the simple techniques and creative ideas outlined in these tutorials, you can elevate your decor game and impress your guests with your handmade creations. So go ahead, unleash your creativity and get ready to enjoy the satisfaction of seeing your unique paper chain designs come to life!