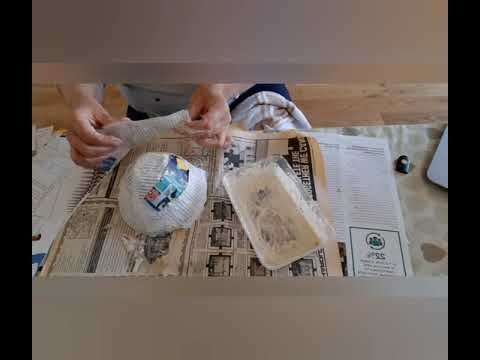
Are you looking to elevate your paper mache crafting game? Look no further! In this article, we’ve gathered the top tips and tricks to help you create stunning and durable paper mache creations. Whether you’re a beginner or a seasoned crafter, these tips will take your projects to the next level. From choosing the right materials to mastering the technique, we’ve got you covered. Let’s dive in and unleash your creativity with these paper mache crafting tips!
What are some ways to improve my paper mache?
Looking to enhance the durability of your paper mache creations? Consider adding additional layers, switching to a stronger adhesive, or applying a protective coating. These simple adjustments can significantly bolster the strength and resilience of your papier mache, making it more long-lasting and suitable for outdoor use. With these techniques, you can elevate the quality of your paper mache projects and ensure they stand the test of time.
What is the optimal number of layers for paper mache?
When creating paper mache projects, it is generally recommended to use at least three layers of paper mache for optimal strength and durability. This ensures that the final product will be sturdy and able to withstand handling without easily tearing or collapsing. By layering the paper mache, you are effectively building up a strong foundation that will hold its shape and structure over time.
Using more than three layers of paper mache can also be beneficial, depending on the size and complexity of the project. Additional layers can provide extra reinforcement and make the final product even more durable. However, be mindful of adding too many layers, as this can result in a thicker and heavier finished piece. Experimenting with different numbers of layers can help you determine the ideal amount for your specific project, ensuring a successful and long-lasting result.
What are the factors that contribute to the strength of paper mache?
Paper mache becomes stronger when additional layers of paper and adhesive are applied. The more layers that are added, the stronger and sturdier the paper mache becomes. This creates a dense and durable structure that is less likely to break or collapse. Additionally, using a strong adhesive, such as white glue or flour paste, can also contribute to the strength of the paper mache. These factors combined result in a stronger and more resilient finished product.
Master the Art of Paper Mache Crafting
Unleash your creativity and master the art of paper mache crafting with our easy-to-follow guide. Whether you’re a beginner or an experienced crafter, our step-by-step instructions will help you create stunning and unique paper mache masterpieces. From simple shapes to intricate designs, the possibilities are endless when you immerse yourself in the world of paper mache.
Discover the joy of working with this versatile and affordable crafting medium as you learn to mold, shape, and paint your creations with precision. With our expert tips and tricks, you’ll soon be crafting beautiful sculptures, masks, and decorations that will impress friends and family. So grab your supplies and get ready to embark on a creative journey as you hone your skills and become a paper mache crafting master.
Expert Tips for Perfecting Your Paper Mache Projects
Are you looking to take your paper mache projects to the next level? Look no further! With these expert tips, you’ll be well on your way to creating stunning and professional-looking paper mache masterpieces. First, make sure to use high-quality materials. The type of paper and glue you use can make a big difference in the final result. Additionally, take your time and be patient. Paper mache is a delicate art form that requires attention to detail and precision. By taking your time and being mindful of each step, you’ll ensure a flawless finished product.
Furthermore, don’t be afraid to get creative with your paper mache projects. Experiment with different shapes and sizes, and don’t be afraid to add in unique elements such as glitter or paint for added flair. Finally, practice makes perfect. The more you work with paper mache, the better you’ll become. So, keep at it and don’t get discouraged if your first few attempts aren’t exactly what you had in mind. By following these expert tips and staying dedicated to your craft, you’ll soon be creating paper mache projects that are truly works of art.
Incorporating these paper mache crafting tips into your projects will undoubtedly elevate the quality and creativity of your work. By following these guidelines, you can achieve stunning results and enjoy the process of creating beautiful and unique paper mache creations. So, grab your materials, unleash your imagination, and start crafting with confidence!


