


Looking for a fun and creative project to do at home? Try out our DIY paper bag mask tutorial! In just a few easy steps, you can transform a simple paper bag into a unique and stylish mask that is perfect for any occasion. Whether you’re looking to add a personal touch to your outfit or just want to have some fun crafting, this tutorial is sure to inspire you. So grab your supplies and get ready to unleash your creativity!
What is the process for making a paper sheet mask at home?
To make a paper sheet mask at home, start by cutting a piece of cotton or tissue paper in the shape of your face. Next, mix together a combination of ingredients such as honey, yogurt, and aloe vera gel to create a hydrating and nourishing mask solution. Apply the mixture onto the paper sheet and gently press it onto your face, leaving it on for about 15-20 minutes before rinsing off. This DIY sheet mask is a cost-effective and customizable way to pamper your skin at home, providing a spa-like experience with natural ingredients.
How can a child mask be obtained?
To bag a child mask, simply place the mask inside a clean, sealable plastic bag. Make sure the mask is folded neatly to prevent any contamination. Press out any excess air from the bag before sealing it tightly. This will help keep the mask clean and ready for use when needed.
When storing the child mask in a bag, it’s important to label the bag with the child’s name or initials for identification. This will help prevent mix-ups and ensure the mask is used by the correct child. Keep the bag in a designated spot, such as a child’s backpack or purse, for easy access and convenience. By following these steps, you can effectively bag a child mask and keep it clean and safe for use.
How can a homemade face mask be packaged?
To package a homemade face mask, you can use a clean, airtight container like a mason jar or a plastic container with a tight-fitting lid. Make sure the container is washed and completely dry before placing the face mask inside. Label the container with the date the face mask was made and any key ingredients used. Store the packaged face mask in a cool, dry place away from direct sunlight to maintain its effectiveness. This will help keep your homemade face mask fresh and ready for use whenever you need it.
Craft Your Own Protective Gear: DIY Paper Bag Mask Tutorial
Looking to protect yourself in style? Try crafting your own protective gear with this DIY paper bag mask tutorial! With just a few simple supplies and easy-to-follow steps, you can create a unique and functional mask that not only keeps you safe but also adds a touch of creativity to your outfit. Whether you’re heading to the grocery store or taking a walk in the park, this paper bag mask is sure to turn heads and keep you protected. So why wait? Get crafting today and show off your personal style while staying safe and stylish!
Simple Steps to a Homemade Mask: DIY Paper Bag Mask Tutorial
Looking for a simple and affordable way to make your own protective mask at home? Look no further than this DIY paper bag mask tutorial. With just a few easy steps, you can create a sturdy and effective mask using materials you likely already have around the house. Not only is this a great way to save money, but it also allows you to customize your mask to fit your personal style and comfort.
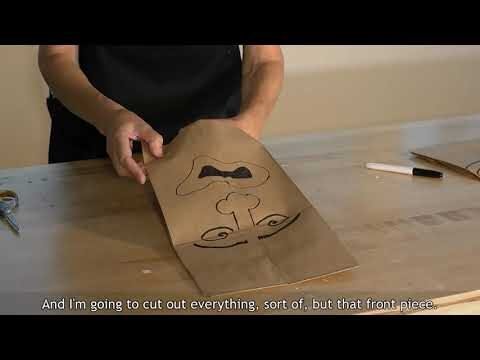
To get started, all you need is a paper bag, scissors, and some elastic bands. Simply cut the paper bag into the shape of a mask, punch holes on each side, and attach the elastic bands. In no time, you’ll have a durable and stylish mask that provides the protection you need. Say goodbye to expensive store-bought masks and hello to a fun and practical DIY project. Try out this paper bag mask tutorial today and stay safe in style!
By following this DIY paper bag mask tutorial, you can create a stylish and sustainable alternative to single-use face masks. Not only will you be reducing waste, but you’ll also be able to customize your mask to suit your personal style. So grab some paper bags and get crafting – your health and the environment will thank you!