


Looking to add a touch of creativity to your next costume party or event? Look no further than our DIY paper maché mask tutorial! With just a few simple materials and a bit of creativity, you can create your very own custom mask that is sure to turn heads. Whether you’re a beginner or a seasoned crafter, this step-by-step guide will walk you through the process of creating a one-of-a-kind mask that reflects your unique style. Get ready to unleash your artistic side and impress your friends with your handmade masterpiece!
How many layers of paper mache were necessary to create your mask?
Creating a paper mache mask is a fun and creative project that only requires three overlapping layers of paper mache. This minimal amount of layers is sufficient to achieve a sturdy and durable mask.
It is important to allow two days for the different steps involved in the paper mache process. This includes the time needed for the layers to dry and set properly.
Additionally, it is crucial to clean the paste off of anything it’s not supposed to be on, as it dries like cement. Taking the time to clean up any excess paste will ensure a smooth and polished finish to your paper mache mask.
What is the best glue for paper mache mask?
The best glue for paper mache masks is white glue, also known as PVA glue. Its strong adhesive properties make it ideal for sticking layers of paper together, creating a sturdy and durable mask. White glue is also easy to work with, dries clear, and is non-toxic, making it a safe option for crafting projects. Additionally, it is readily available in most craft stores and is relatively inexpensive, making it a popular choice for paper mache projects.
Which is better for paper mache, glue or flour?
When it comes to making paper mache, using glue or flour can both be effective, but it ultimately depends on your preference and the desired outcome. Glue tends to create a stronger and sturdier finished product, making it ideal for projects that require durability. On the other hand, flour is a more cost-effective option and can be easily made at home. It also has a more natural and eco-friendly appeal, making it a great choice for those looking to reduce their environmental impact.
In conclusion, whether you choose to use glue or flour for your paper mache project, both options have their own unique benefits. Consider factors such as cost, strength, and eco-friendliness when making your decision. Experiment with both materials to see which one works best for your specific project needs and enjoy the creative process of crafting with paper mache.
Crafting Your Own Paper Mache Masterpiece
Are you ready to unleash your creativity and make something truly unique? Look no further than paper mache! This versatile and affordable crafting material allows you to bring your wildest ideas to life. Whether you want to create a decorative mask, a stunning sculpture, or a one-of-a-kind piece of art, paper mache is the perfect medium to work with.
The process of crafting your own paper mache masterpiece is both fun and rewarding. All you need is some newspaper, flour, water, and a bit of imagination. Simply mix the flour and water to create a paste, tear the newspaper into strips, and start layering them onto your chosen form. Once your creation is dry, you can paint and decorate it to your heart’s content. The possibilities are endless, and the satisfaction of seeing your vision come to life is truly priceless.
So why not gather your supplies and get started on your paper mache masterpiece today? With just a few simple materials and a whole lot of creativity, you can craft something truly extraordinary. Whether you’re a seasoned crafter or a beginner looking for a new hobby, paper mache is the perfect way to let your imagination run wild and create something truly unique.
Mastering the Art of Paper Mache
Discover the secrets to mastering the art of paper mache with our comprehensive guide. From choosing the right materials to perfecting your technique, we’ll help you unleash your creativity and create stunning paper mache masterpieces. Whether you’re a beginner or an experienced crafter, our tips and tricks will take your skills to the next level, allowing you to bring your imagination to life with this versatile and affordable medium. Say goodbye to lumpy, uneven projects and hello to smooth, professional results as you become a paper mache pro in no time.
Step-by-Step Mask Making Magic
Step-by-Step Mask Making Magic is your guide to creating beautiful and unique face masks from the comfort of your own home. With easy-to-follow instructions and helpful tips, you’ll be able to craft a mask that fits your style and personality. Whether you’re a beginner or a seasoned crafter, this book has something for everyone.
From choosing the perfect fabric to adding special embellishments, Step-by-Step Mask Making Magic walks you through each step of the mask-making process. You’ll learn how to properly measure and cut your fabric, as well as how to sew and finish your mask with professional-looking results. With clear and concise directions, you’ll be amazed at how quickly you can create a custom mask that you’ll be proud to wear.
Whether you’re looking to make a fashion statement or simply want to stay safe and stylish, Step-by-Step Mask Making Magic has everything you need to create the perfect mask for any occasion. Say goodbye to boring disposable masks and hello to a fun and creative way to protect yourself and others. Get ready to unleash your creativity and make magic with your very own handmade masks.
Creating Your Custom Paper Mache Mask
Are you looking to add a personal touch to your next costume or party? Why not try creating your own custom paper mache mask? With just a few simple materials and a little creativity, you can design a one-of-a-kind mask that will be sure to turn heads. Whether you’re a beginner or a seasoned crafter, this DIY project is a fun and rewarding way to express your individuality and showcase your artistic talents. So why settle for a generic store-bought mask when you can make something truly unique and special?
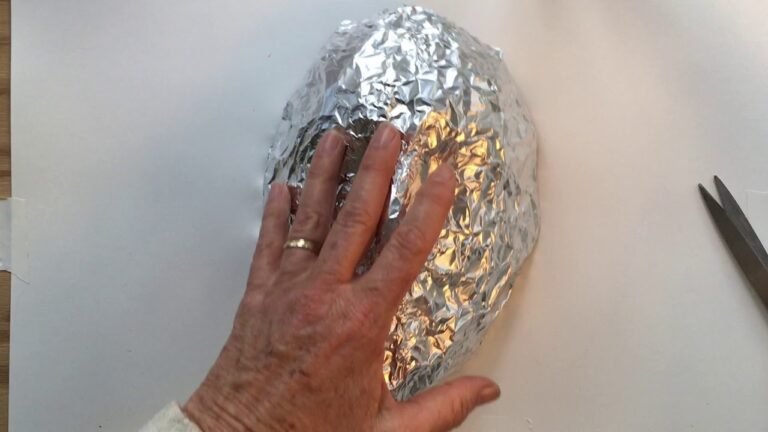
Creating your custom paper mache mask is easier than you think. All you need is some newspaper, flour, water, and a mold to shape your mask. Once you have your base, the possibilities are endless. You can paint, decorate, and embellish your mask to reflect your personality and style. Plus, by making your own mask, you can ensure a perfect fit and comfort, making it ideal for long hours of wear at any event. So why not unleash your creativity and make a statement with a custom paper mache mask?
In just a few simple steps, you can create your own stunning paper mache mask that is uniquely yours. With a little creativity and imagination, the possibilities are endless. Whether it’s for a costume party, a school project, or just for fun, this DIY paper mache mask tutorial is a great way to unleash your artistic side and make something truly special. So gather your materials and get ready to bring your vision to life with this enjoyable and rewarding craft project.